Add a Working Mixx Bookmark Icon to the Blogger/Blogspot Platform : Classic or Custom Templates
December 7th, 2007
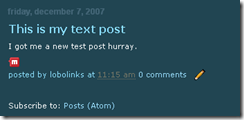
It literally took me about 2 hours to figure out the syntax for blogspot. I have no idea how people put up with that compared to a self-hosted blog, sigh. Anyway upon request, here are the steps to adding a Mixx Icon that works properly for the old and new Blogger templates.
First the Icon
You can always use one of the existing buttons or badges from the Mixx site. This is what I had on hand.
![]()
Right Click and Save as. You will need to host the Icon yourself, sorry.
The Code
If you don’t know, you need to navigate to your blogger admin panel and get to the template tab.
Now go to edit html.
Since every template is different it is hard to pin down exactly where you will have to add the following code, but I tried to give an example where I added mine..
Older or Classic Template Syntax
Find
[html]
<!– End .post –>[/html]
Add above
[html] <a title=”Submit to Mixx” href=”http://www.mixx.com/submit?page_url=<$BlogItemPermalinkURL$>” target=”_blank”><img src=”http://www.yoururl.com/mixx.png” border=”0″ alt=”” width=”16px” height=”14px” /></a>[/html]
Updated or Custom Template Syntax
Be sure to check “Expand Widget Templates”
Find
[html]
<div class=”post-footer”>
[/html]
Below Add
[html]<a title=”Submit to Mixx” target=”_blank”><img src=”http://www.yoururl.com/mixx.png” border=”0″ alt=”” width=”16px” height=”14px” /></a>[/html]
[html]
<!– End .post –>[/html]
Add above
[html] <a title=”Submit to Mixx” href=”http://www.mixx.com/submit?page_url=&lt;$BlogItemPermalinkURL$&gt;” target=”_blank”><img src=”http://www.yoururl.com/mixx.png” border=”0″ alt=”” width=”16px” height=”14px” /></a>[/html]
Add above
[html] <a title=”Submit to Mixx” href=”http://www.mixx.com/submit?page_url=<$BlogItemPermalinkURL$>” target=”_blank”><img src=”http://www.yoururl.com/mixx.png” border=”0″ alt=”” width=”16px” height=”14px” /></a>[/html]

